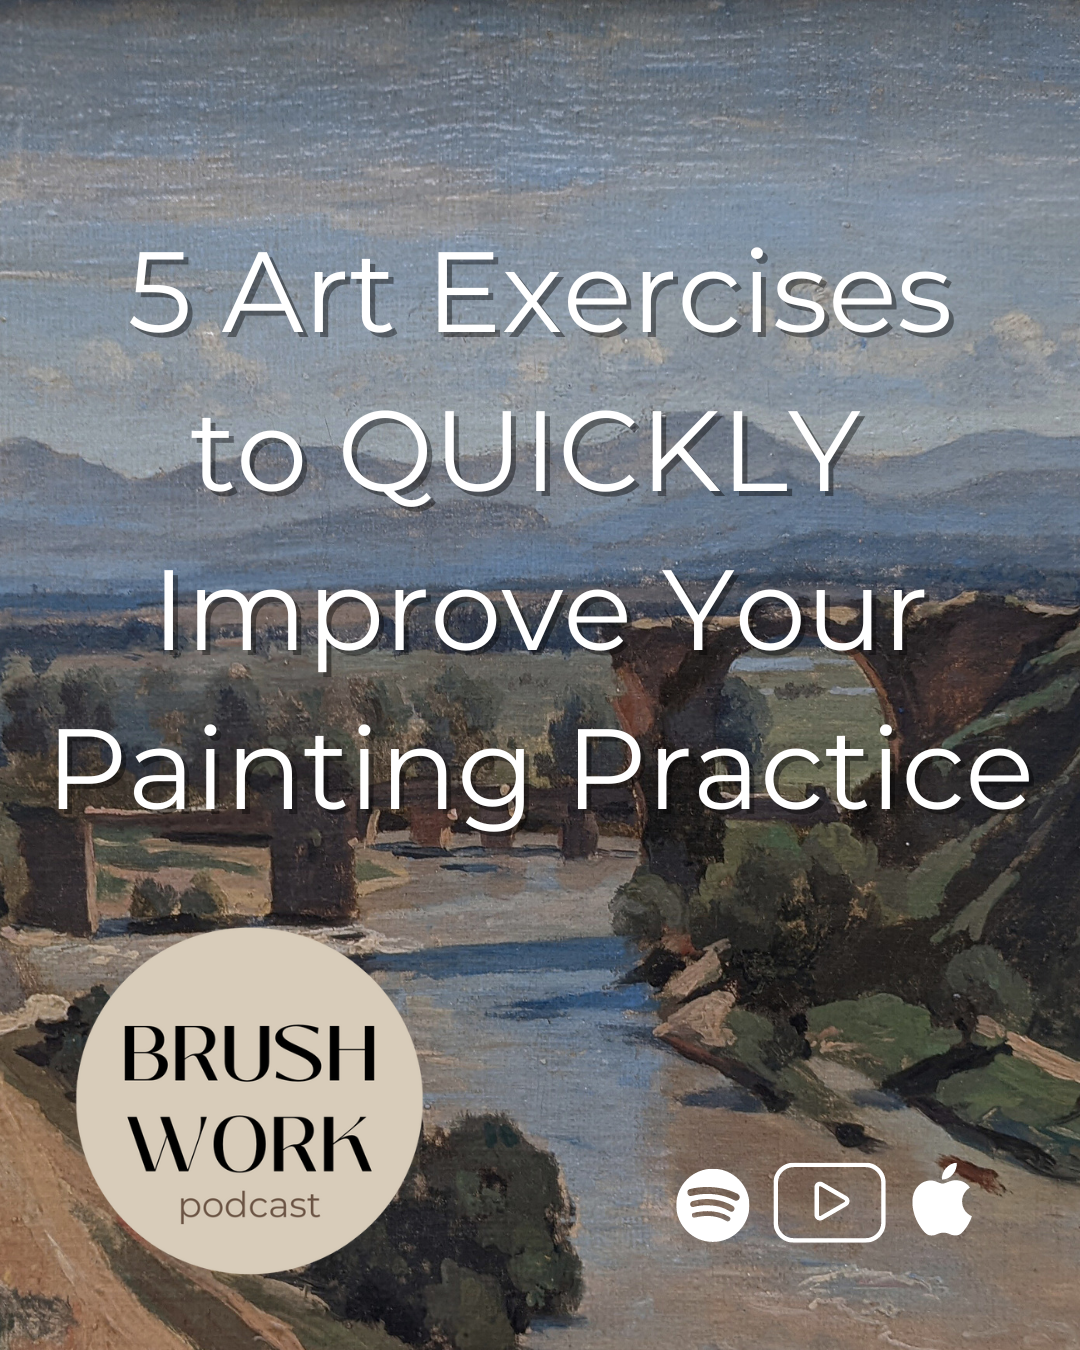
5 Art Exercises to QUICKLY Improve Your Painting Skills
I’ve gone to many classes, residencies, and private coaches over my career; these 5 exercises dramatically improved my painting skills. Some of these will tune your artistic eye wile others will be about technical improvements.
Each of these exercises should take you between 5-60 min, don’t be tempted to spend more time on it and turn them into Projects.
With each exercise I’ll tell you the instructions, how often to do the task, how long before you’ll notice improvements (some will be immediate), and what I’ve gained from them in my practice.
Want to get better at making art? Let’s dive in.
Transcriptions
What you’ll need: Oil painting pallet in earth tones, a 1 inch wide filbert brush (size 10+), oil painting paper or canvas, images of 100 year+ master paintings (printed or digital).

By Jean-Baptiste Camille Corot - photo Shonagon 2022-04-07, Public Domain, https://commons.wikimedia.org/w/index.php?curid=116802569
How:
Pick out some images of master paintings, avoiding contemporary work when starting out. I like Corot, Giotto di Bondone, Diego Velázquez, Sargent, and Cassatt (do not go more modern than her).
On your canvas or oil primed paper, draw out a postcard sized frame (4x6 inches approximately) to the ratio of one of the master paintings you’ve chosen.
Using a size 10 or bigger brush, create a copy of the master painting in this tiny size. Flat topped is best!
DO NOT SKETCH IT OUT. Go right into painting.
The idea is not to make an exact replica, but to create the image in miniature. Your goals are to get the feeling of the painting, the composition, and the color exact while forgoing detail.
After the hour is over, stop painting and step back, comparing the master image to the transcription and compare the two. Note where there is success and note where there is room for improvement.
Time: 30-60 min. For best success do not go over an hour, set a timer. The painting should be FINISHED.
Repetition: Do one of these a day for 100 days.
Results: In a little over three months your technique, your eye, and your satisfaction for what is good will transform. By doing transcriptions, you learn how other artists work, how they see, and what made them great. By doing them very small you gain many other benefits.
One summer I did 100 of these and after, my abstract work improved by LEAPS. You will gain improvement in line, composition, color control, brush control, understanding of light, how to develop a daily creating practice, and much more.
Tips:
When you begin you will be satisfied with what you make, be alarmed for this response. If you feel like the transcription is perfect, you are not looking critically enough at your work. Do not go back to a previous transcription.
Do not sketch out the painting before starting. If you must make marks, do so with paint.
You can do this exercise with gouache paint to great success. That said, I recommend sticking to oil paint if you primarily use oil paint.
Every 7 transcriptions completed, put them all together and analyze your weaknesses.
Don’t be satisfied with the first color you make.
You should be spending more time mixing color than painting.
Get the whole painting finished by the time the hour is up. Really push yourself!
Do not use a smaller brush.
After doing 100+ of these you can start to allow yourself to work with more contemporary images, but starting with the masters will learn you good habits.
2. Black Mirror
What you’ll need: Your cellphone or a digital screen. Black pens or monochrome paint. A sketchbook or painting surface.
How:
Turn your screen off and look through it. You will notice that the reflection is a mirror that takes away most color.
Mark out a rectangle the ratio of your screen on your drawing/painting surface
Aim your screen so that you are looking at a window, landscape, or simplified interior scene. Avoid the self portrait at first.
Make a black and white drawing/painting of what you see though the Black Mirror.
Time: 15-30 min
Repetition: Once a day for a week, whenever you don’t know what to make, as a warm up

Results: Because the black mirror takes away the majority of color, you’ll be able to see what light and tone are doing in your space.
Tips:
Markers: Get three markers: black, light grey, dark grey. Be precise in your movement and fill up all the space of the ‘frame’ you’ve made as quickly as possible.
Don’t do this exercise with pencils- no erasing!
Paint: Pre mix a 5-7 step greyscale with white and black at the ends. I like using a warm white and a cold black. Don’t let the canvas show through the study.
The quicker you do this study, the better you will train your eye.
The black mirror can also be used to help you problem solve in paintings that aren’t working out for you.
Looking though the black mirror will reduce visual information and show you where balance is.
3. Blind Contour
What you’ll need: Pen and paper, an object or person or plant. (I’m a fan of trees)
How:
Using a pen and your sketchbook, draw whatever it is in front of you. A person, a tree, a teacup.
Don’t look at your page as you draw.
Don’t lift up the pen as you draw. You will make one continuous line as you draw out the shapes and lines of whatever you are illustrating.
Go as slow as you can, letting your eye translate every curve and shape and mimic that with your hand.
When you are done with the image, look down at your drawing and compare it with reality.
Time: 5-15 min
Repetition: Do this as many times in a row till your hand-eye coordination starts to line up.
Results: Your focus and fine motor skills will increase each time you do this exercise. I notice a remarkable difference in my painting when I do a few of these as a warm up.
4. 3 Spots
This exercise is about mixing color. The idea is to take a picture of an old master work or a picture you’ve taken and mix 3 colors that adequate represent the image.
What you’ll need: Your oil painting palette. A few reference photos. Pallet knife. A brush of any size. A sketchbook or canvas.
How:
On your pallet pour a quarter size of paint of every color that you like to use. I like Cadmium Yellow, Yellow Ochre, Burnt Umber, Cadmium Red, Alizarin Crimson, Ultramarine Blue, Phthalo Blue or Green, Sap Green, Ivory Black, and Warm White. Add any colors in your regular rotation.
Pull out your first reference photo. Your challenge is to mix 3 colors that capture the essence of the image.
Place those colors in 3 spots that are touching on your canvas.
Repeat with the next image.
Time: 15-30 min
Repetition: 5 images at a time, until you can create these colors quickly. Might take a month if you do it often.

Results: Think of this as speed dating but for paint. By taking 3 essential colors of the image you chose and learning to mix them exactly and quickly, you will paint faster and more accurately in the future. You will also learn a lot about color relationships and how they seem to change when next to another.
Tips:
Mix the color until you get it right. Do it over and over until the color is perfect.
Spend more time mixing paint than you think.
If you are having trouble choosing which 3 colors to chose from a picture, use digital tools to help. I make this color reference using Instagram Stories and the color picker tool. That set of three dots will be the colors I try to make.
You might be thinking you are wasting paint with this exercise. Instead think like this: “I am learning, therefore I am using the color to it’s best purpose.”
5. Squint
What you’ll need: Your eyes
How:
Go outside and look at a landscape.
Squint your eyes until most visual information is gone. Nearly closed. Some people might be able to just take off their glasses.
You should be squinting so much that you can’t define the leaf off a tree.
Notice the big shapes that form and how the landscape simplifies.
Notice the colors that show up and how the values solidify
Notice the temperature of the day
Now look at one thing, say it’s the roof a building. Once you’ve looked at it (with pin point focus) change your gaze to something that is right next to it (A tree or the sky)
Notice how the colors change when your focus changes.
Time: 2 min
Repetition: All the time, but not when driving.
Results: Camera’s do this really well, but we have to train our eye to see such obvious difference. In the pictures included here I’ve trained my phone on the house first, and then the fence.
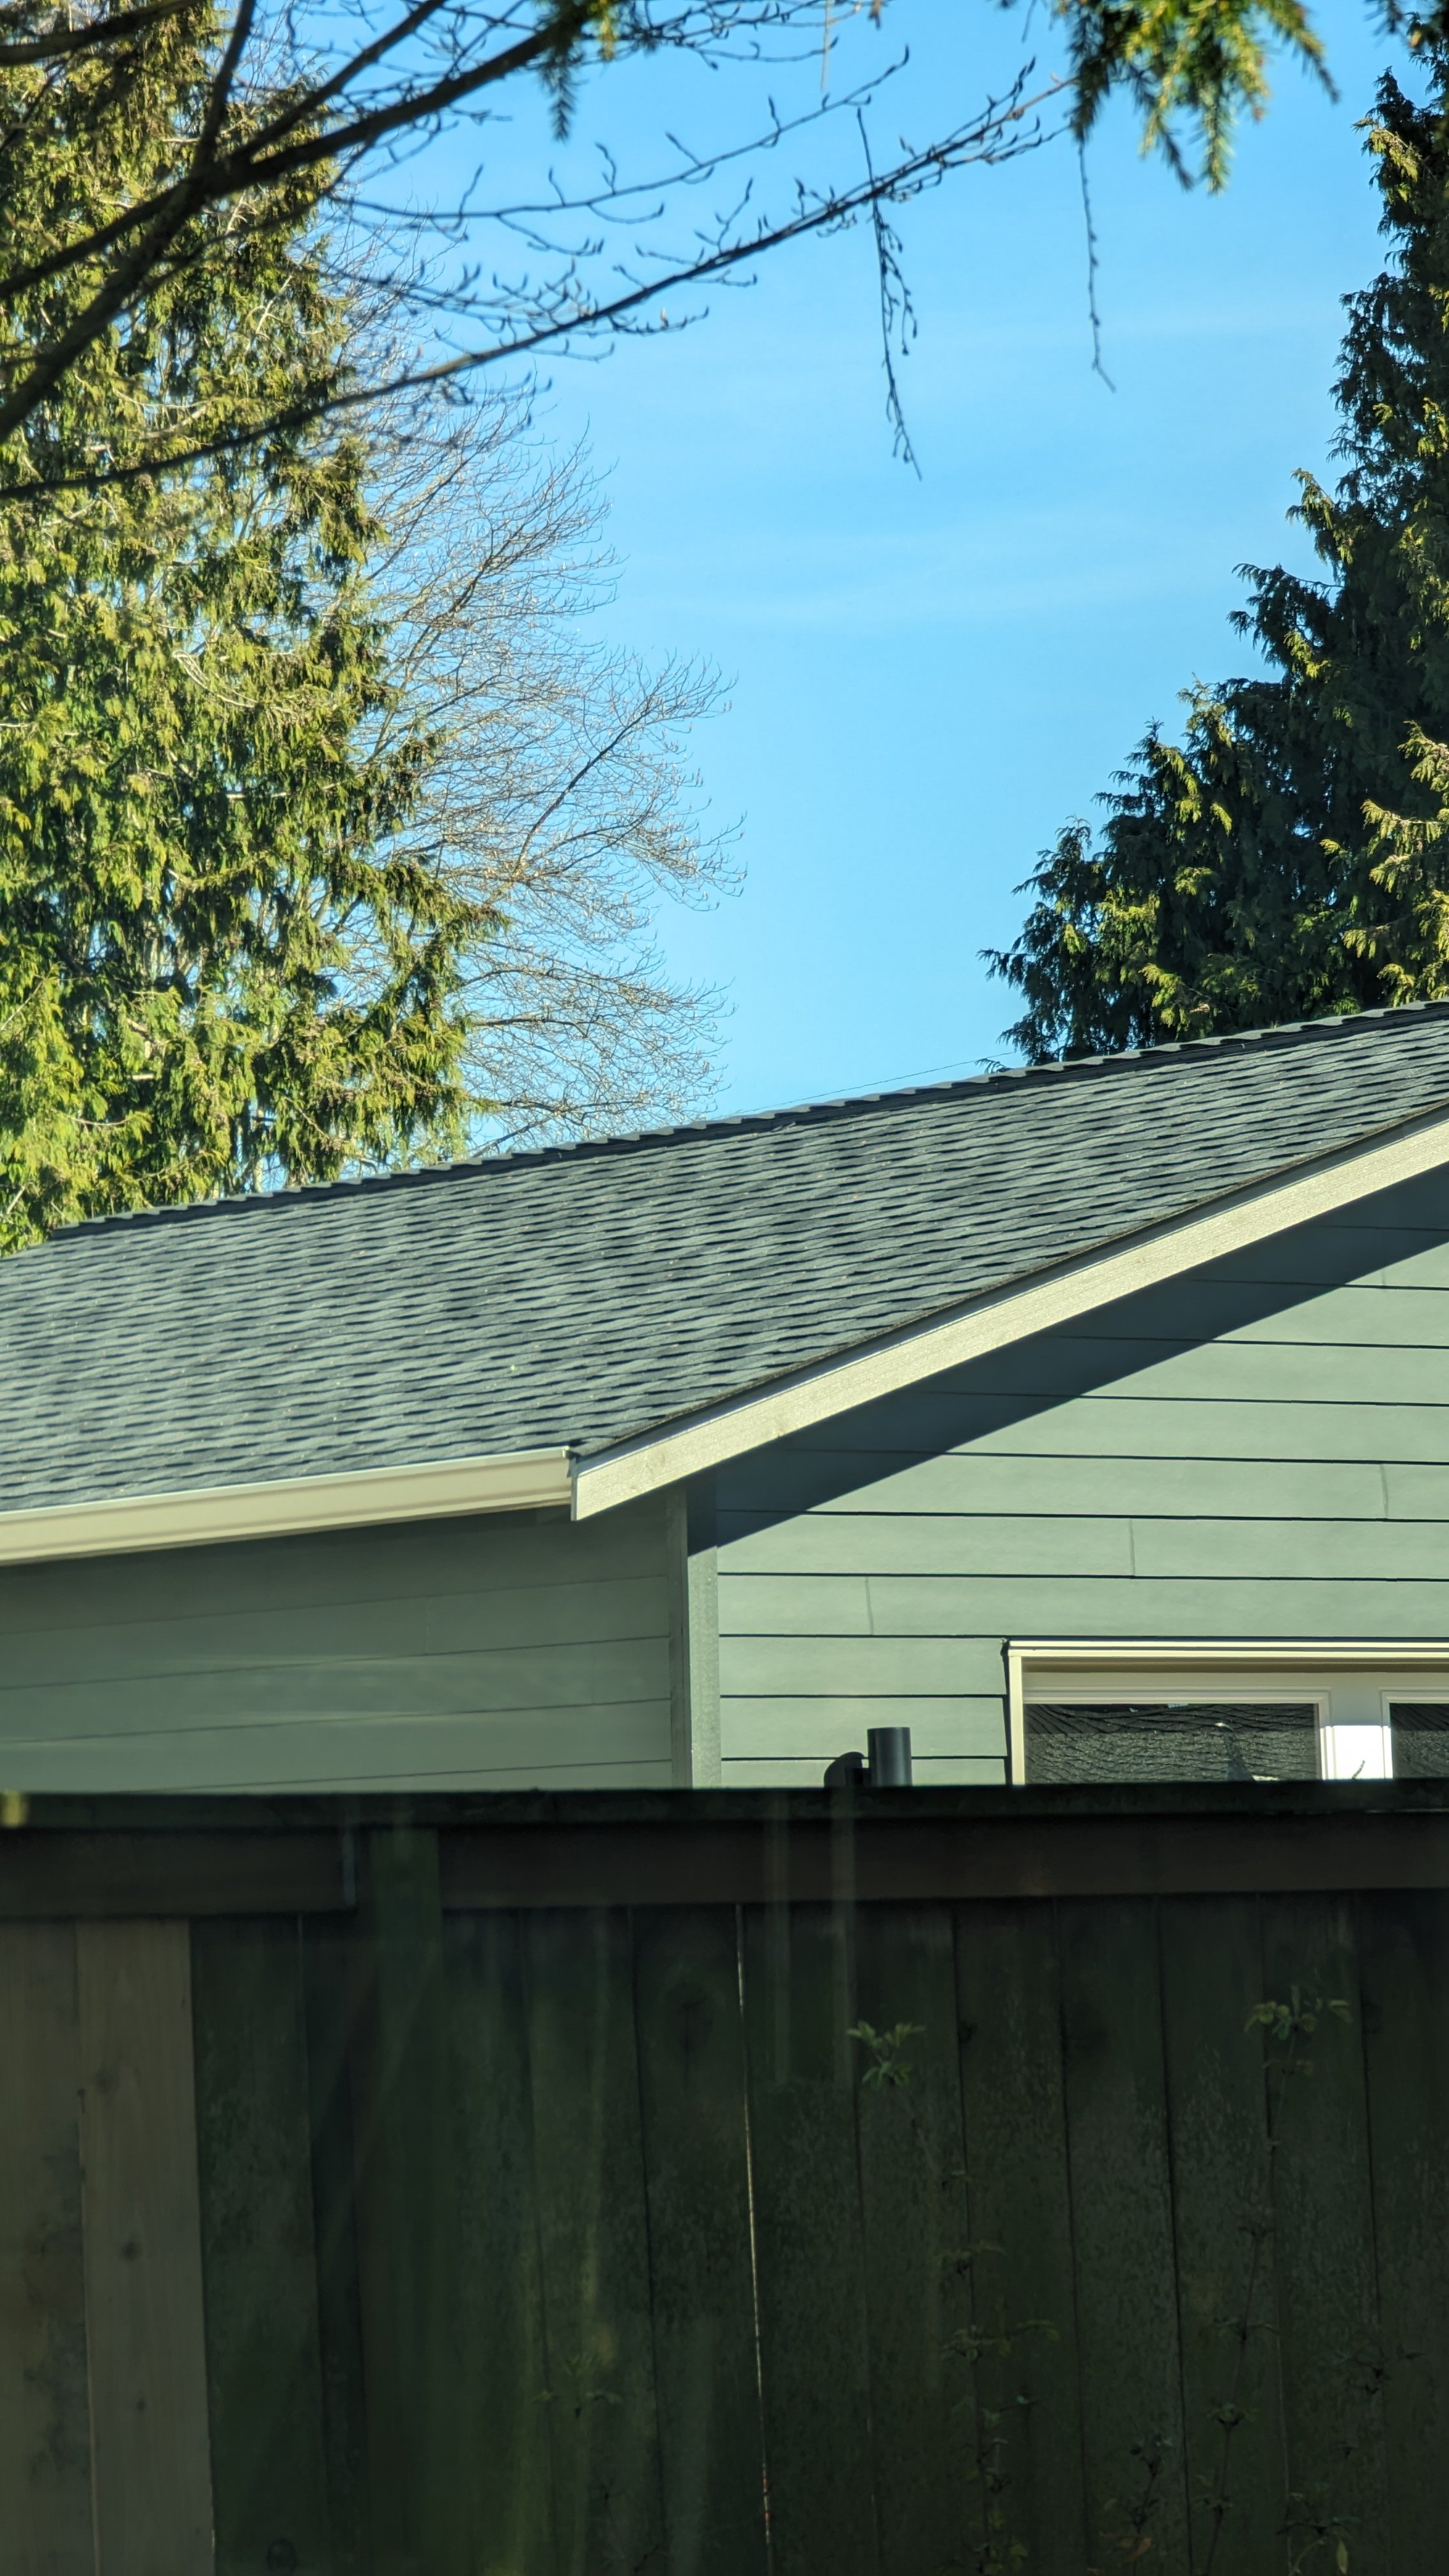
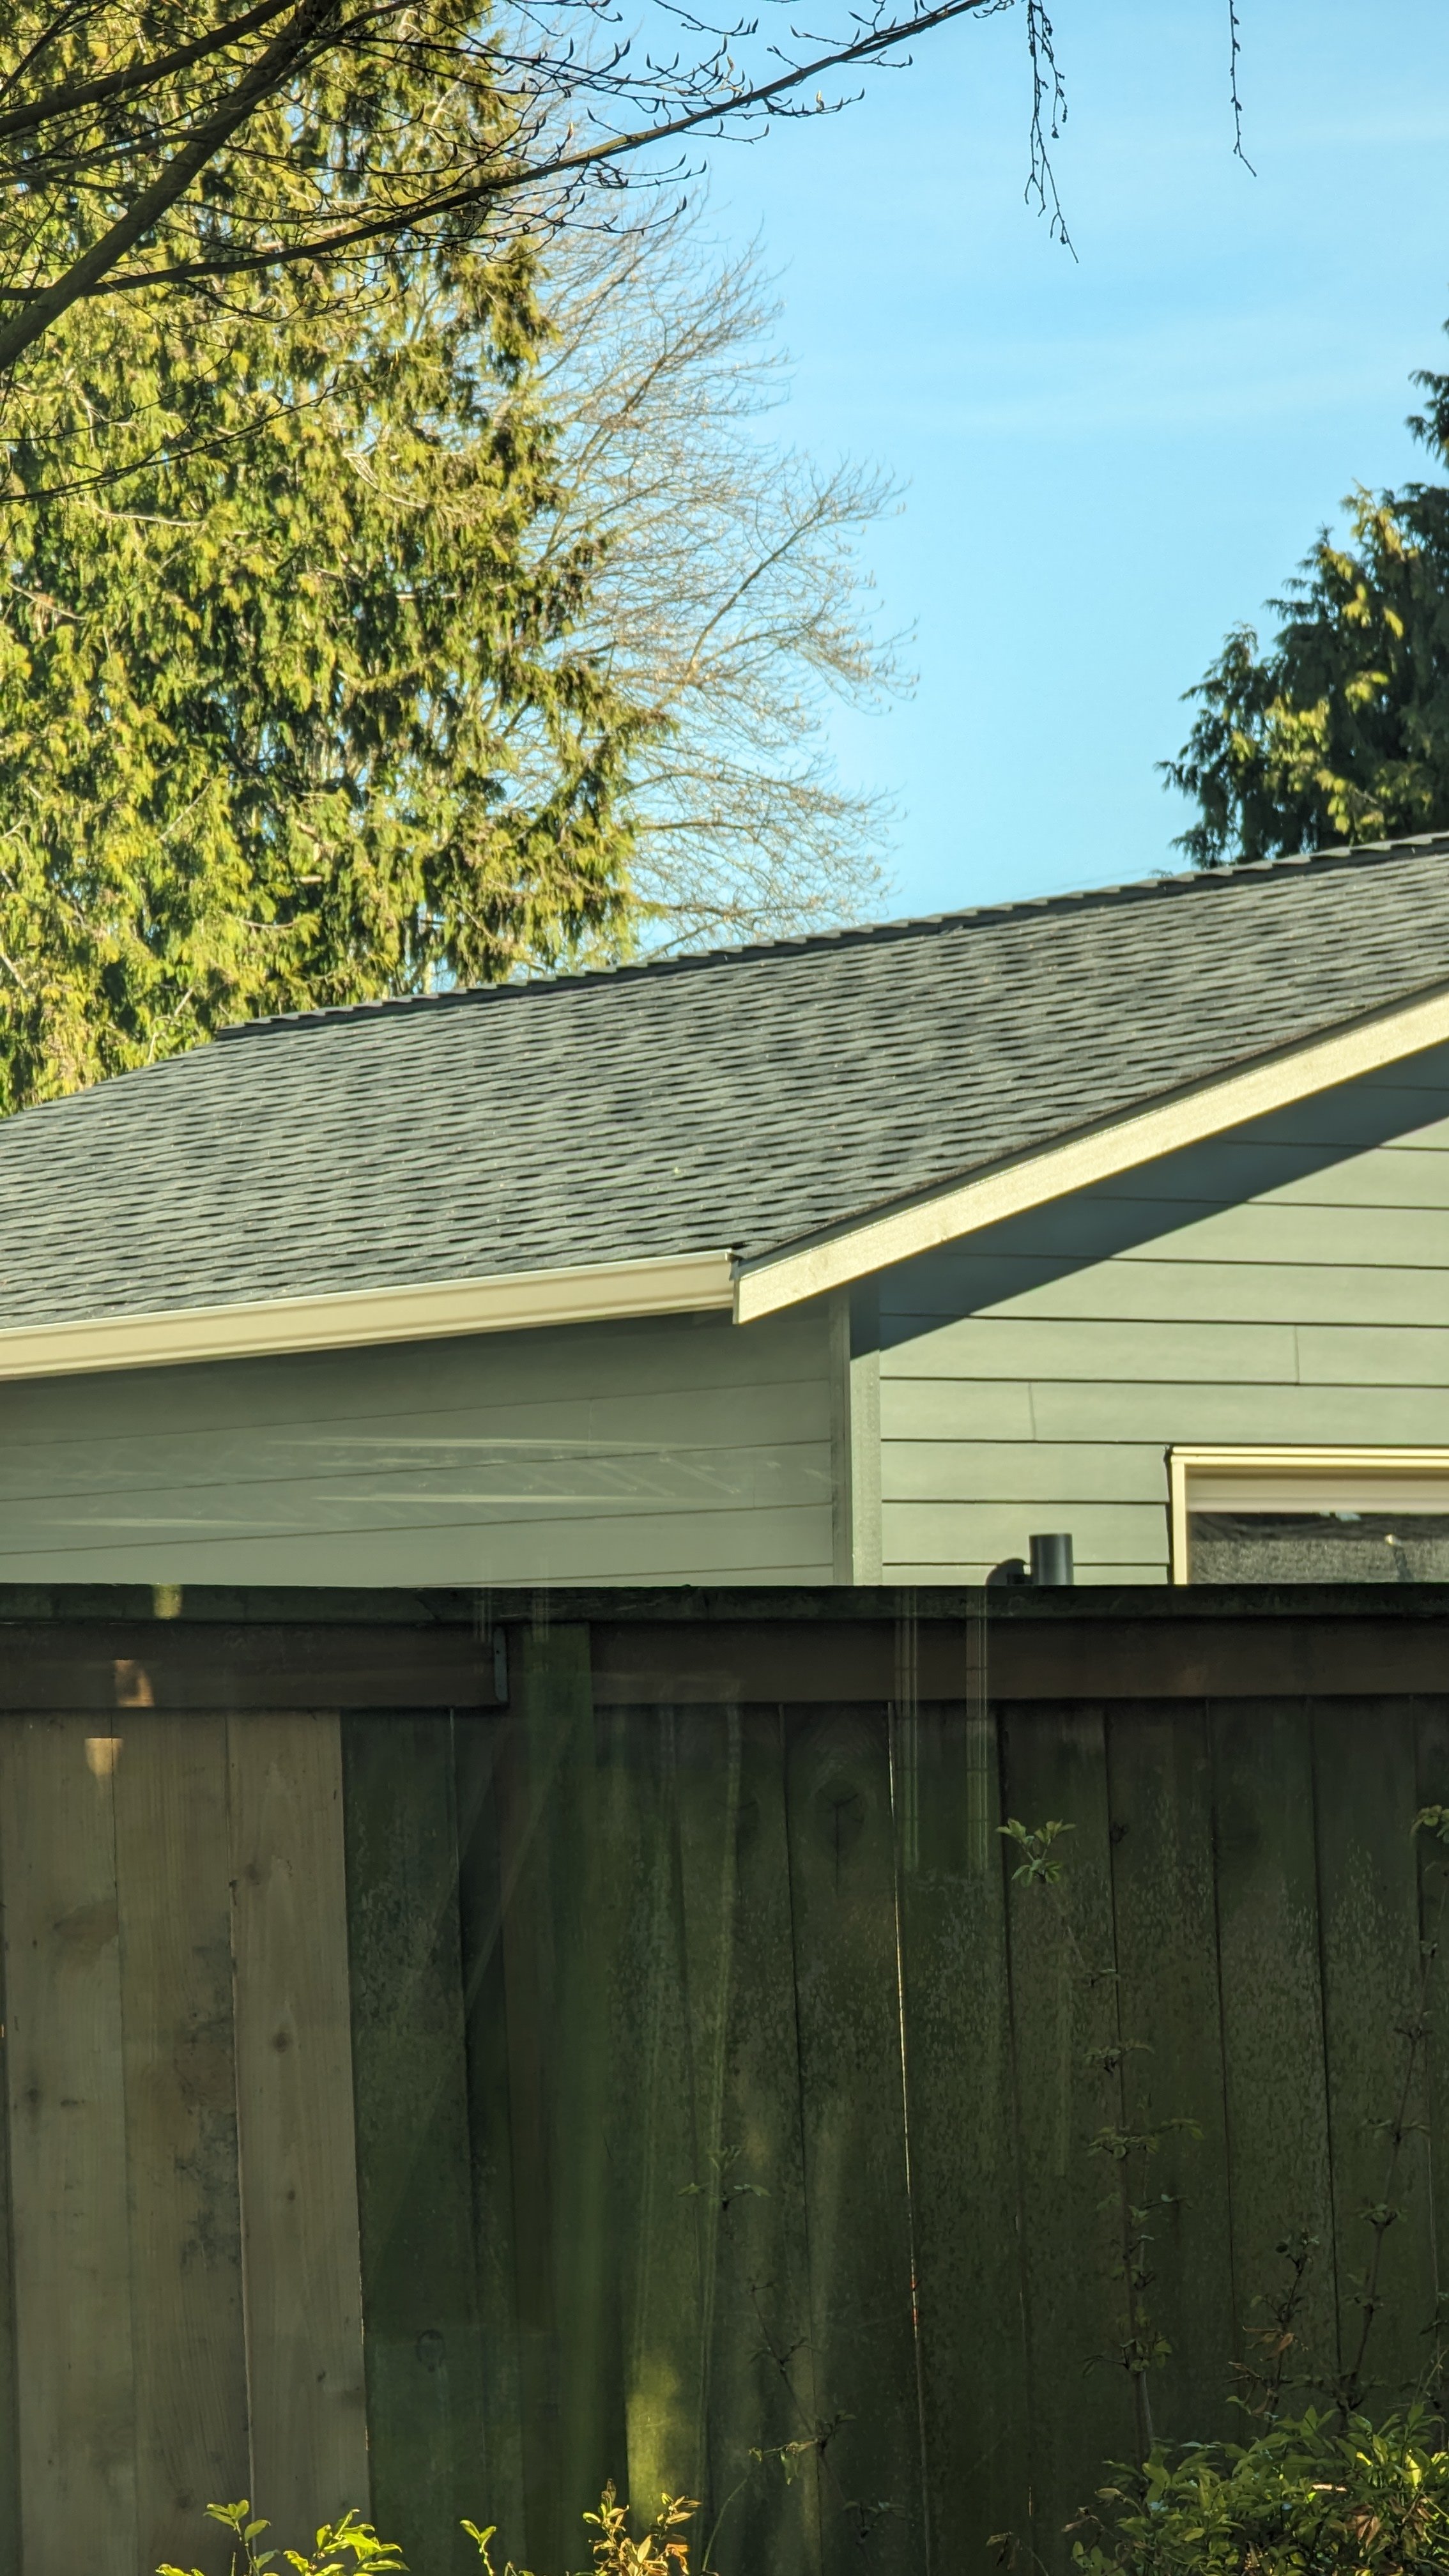
I haven’t done any color correction here. Notice when the focus is on the house (left) that the colors of the whole image are much cooler and the fence is VERY dark. When the focus changes to the fence (right) everything in the picture brightens up in relationship to the new focus. The sky, the tree, the house paint color, and the roof are all lighter and warmer.
What this exercise does is train your eye on color relationships. When you go to paint something in the future, think about where the focus in the painting is and how your colors should change. This works in abstraction to.
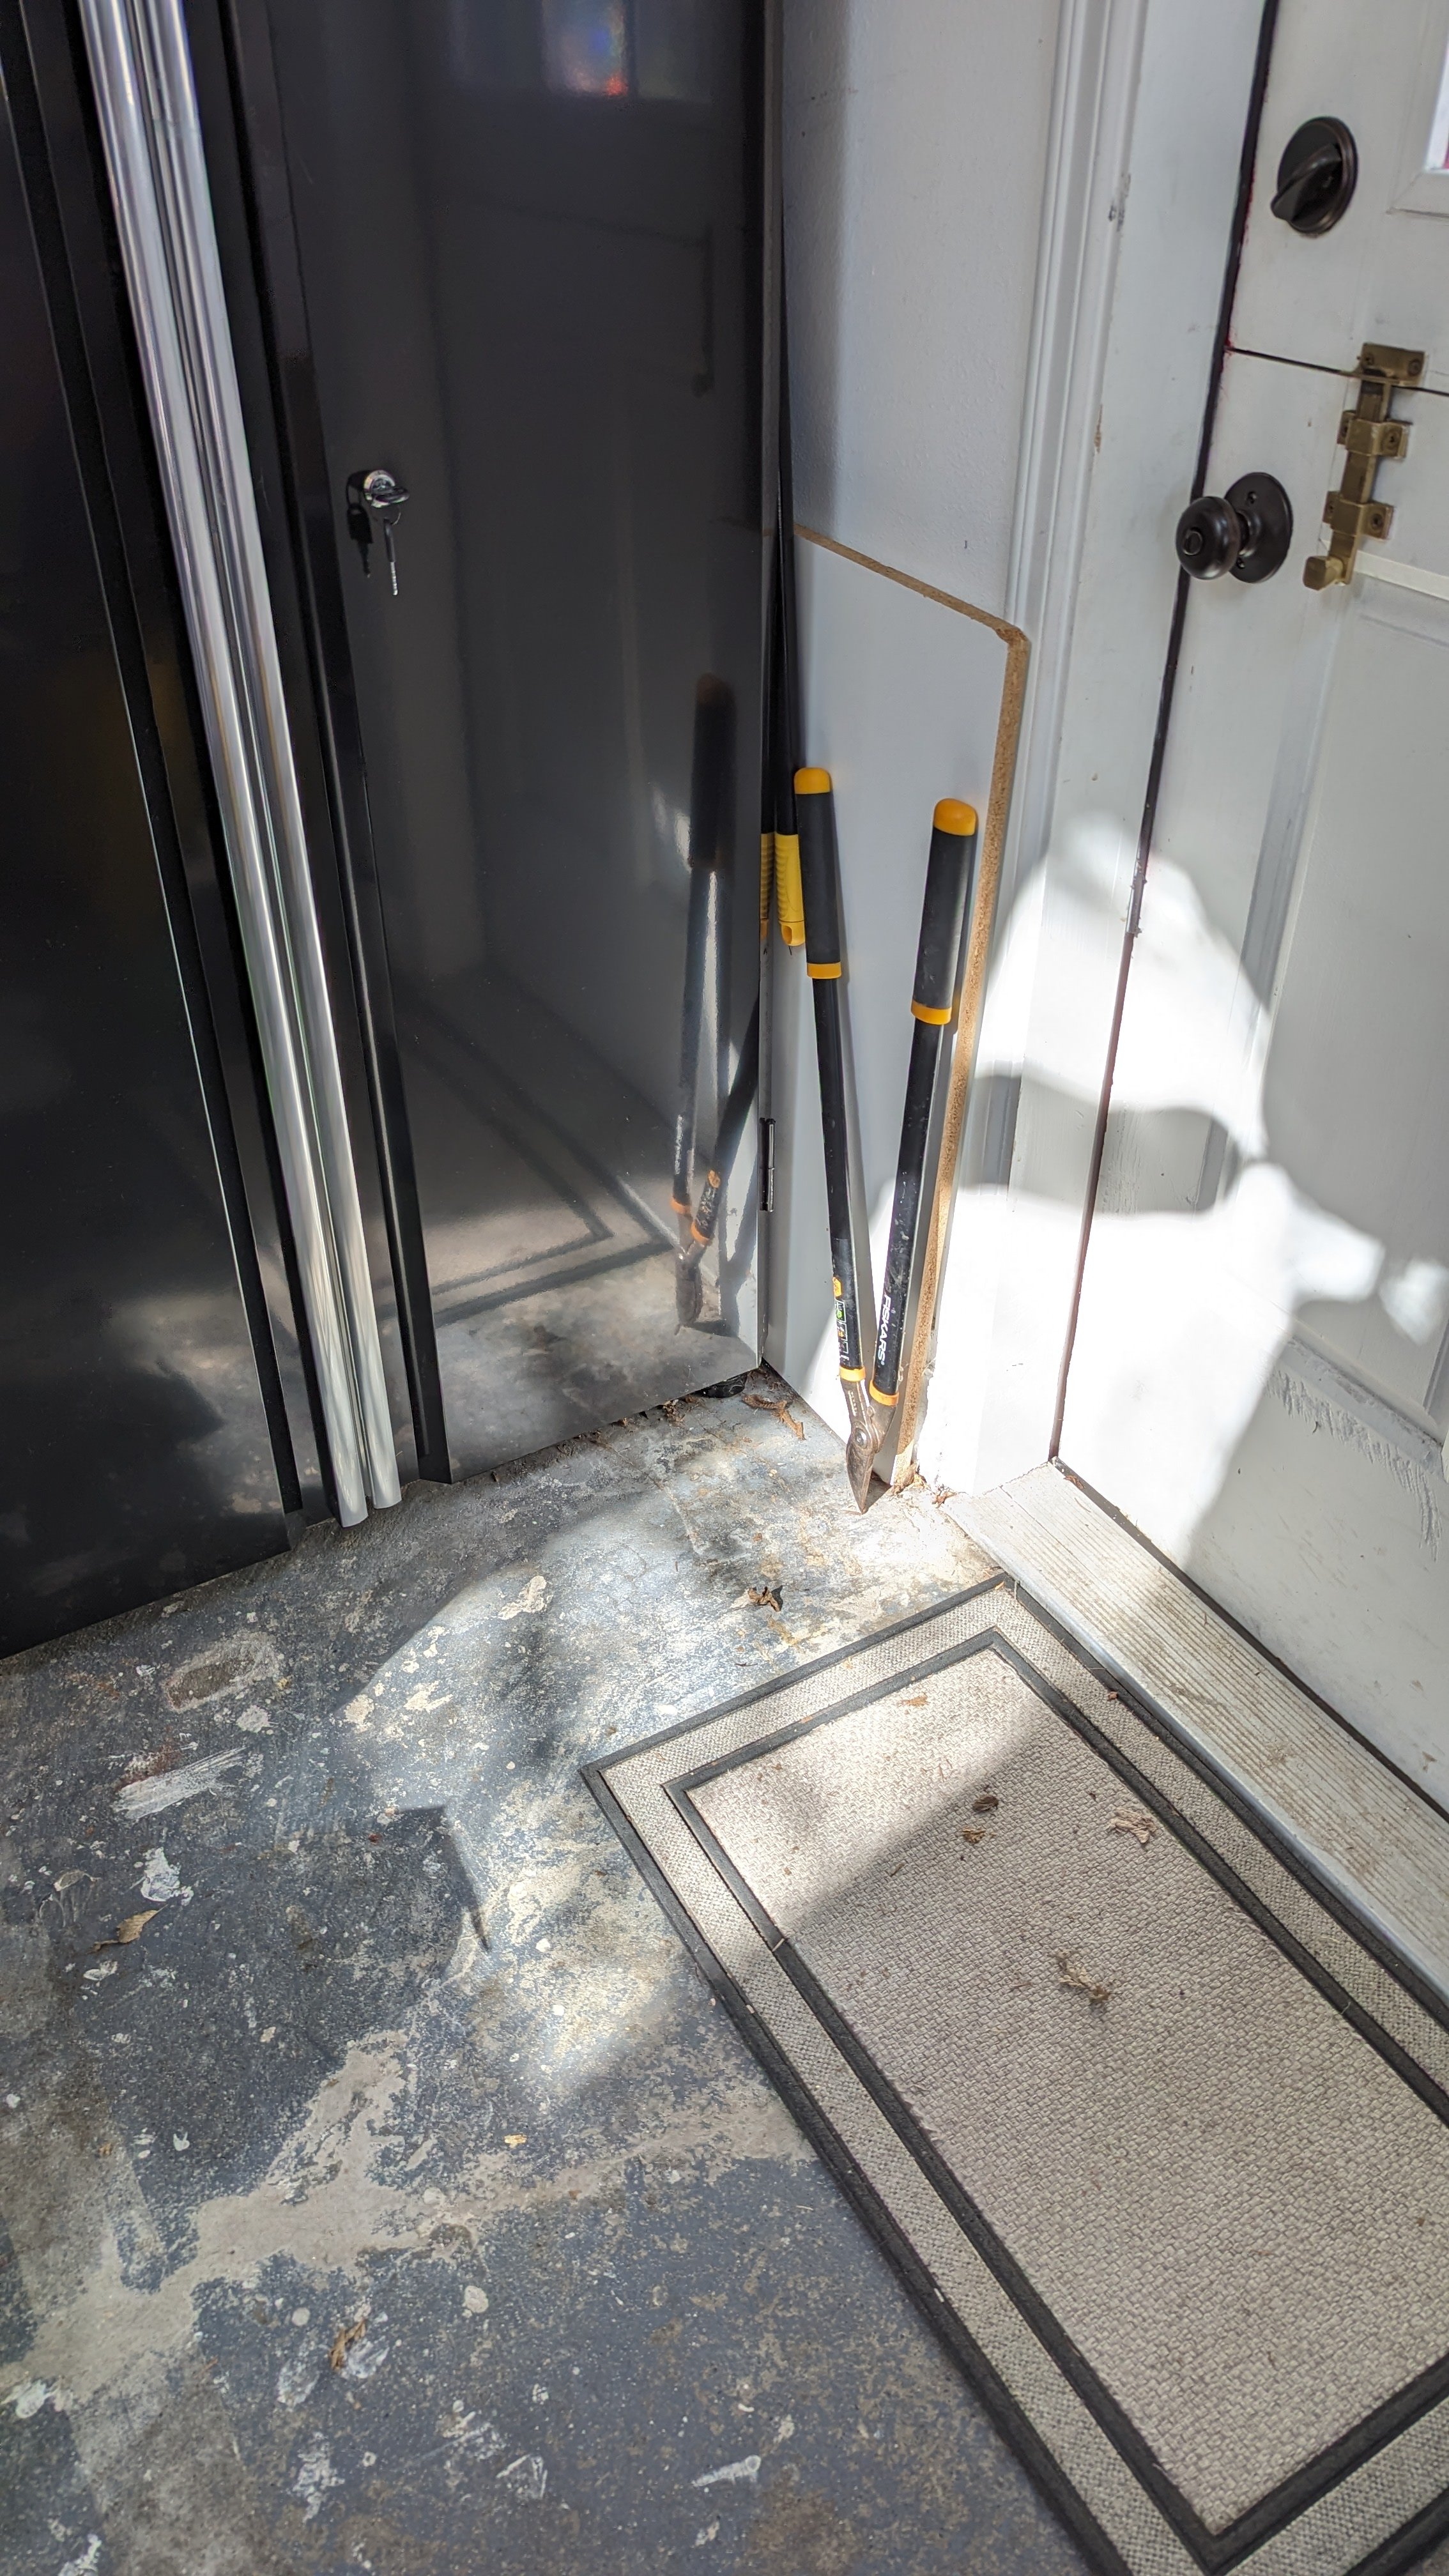
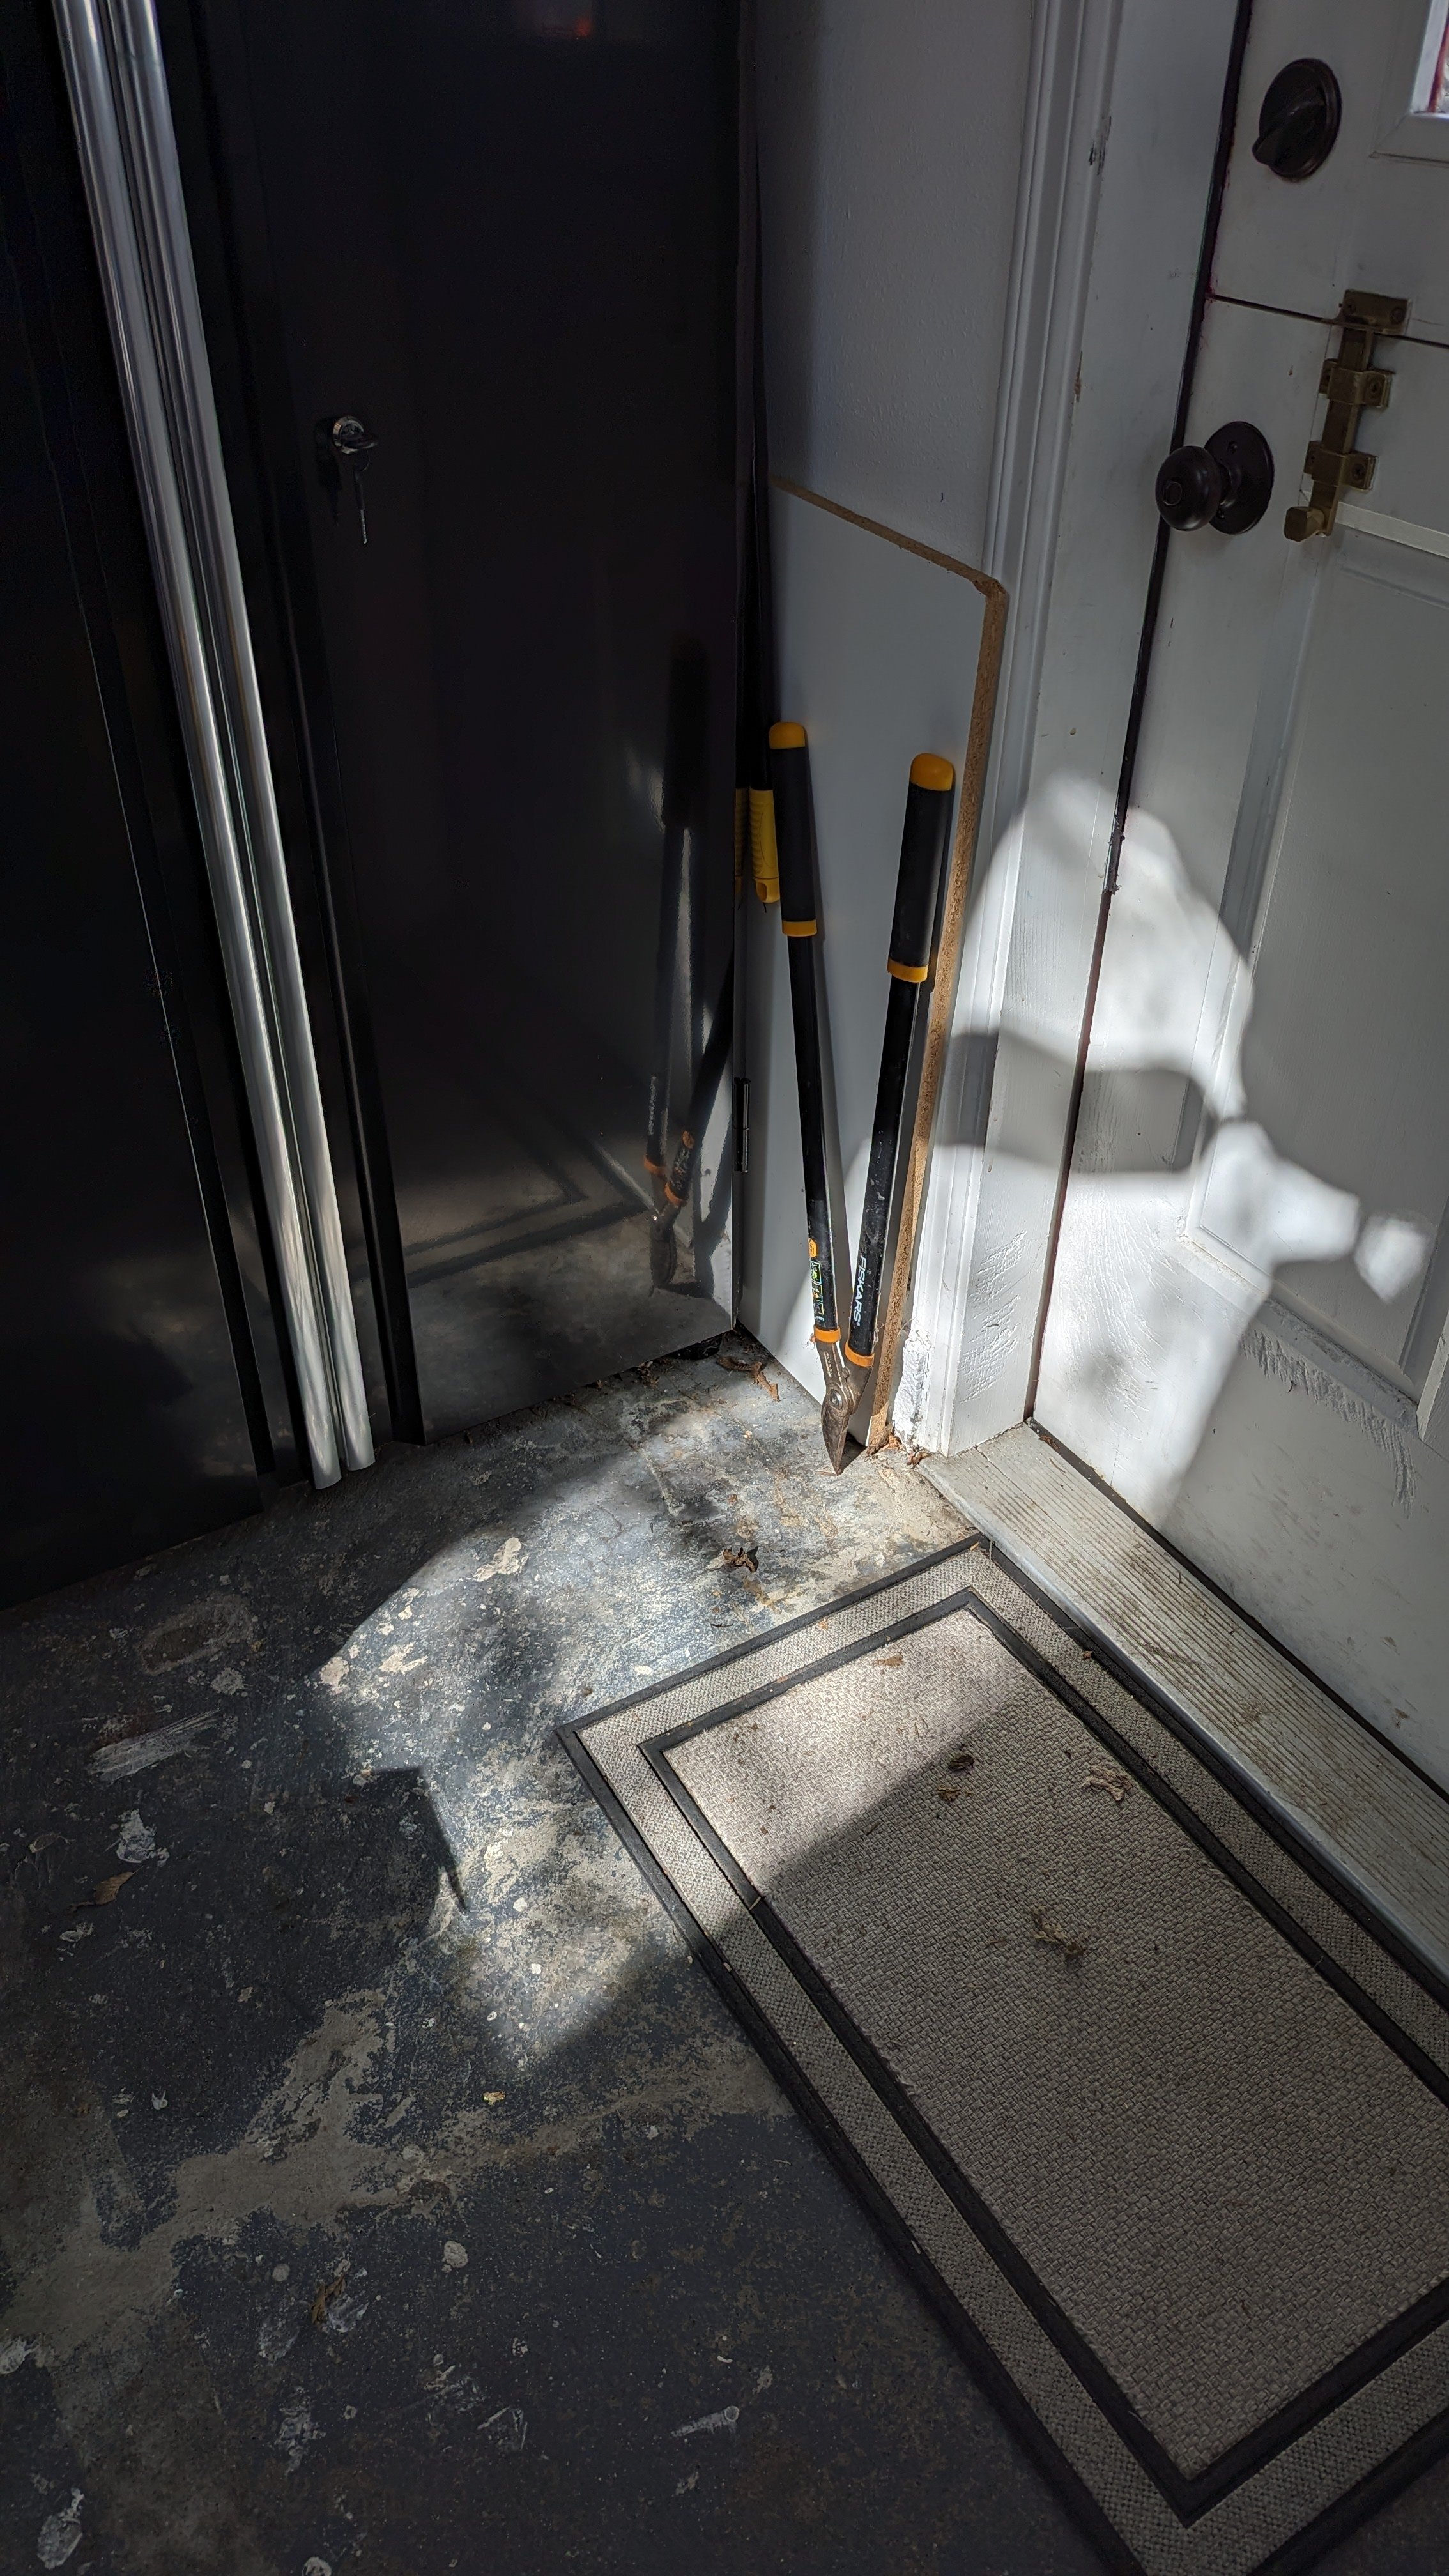
Another example: When I focus on the color of the black cabinet, everything else lightens up with the sun spot getting blown out (left). If I focus on the sun spot on the wall/floor (right) everything goes majorly to low key and darkens.
You can train your eyes to do this and it will help you carve out shapes, make better color choices, and see things in great perspective. Just squint!
Host and artist Stephanie Scott breaks down the practicality of the art career with topics including: sustainable creative practices, social media skills, and the mindsets that keep it all together. New episodes every Tuesday!
Submit to Brush Work: https://www.stephaniescott.art/brush-work-submission
Instagram: https://www.instagram.com/stephaniescott.art/
Website: http://www.stephaniescott.art/brushwork
Music by @winepot https://www.instagram.com/thewinepot/
YouTube: https://www.youtube.com/@stephaniescottart
Podcast Cover photo by Maryna Blumqvist https://instagram.com/picturemaryna